REVIEW · SAPPORO
Sapporo Tour in the Port City of Otaru and Local beer brewery
Book on Viator →Operated by Snow Monkey Resorts Tours (Machinovate Japan Ltd.) · Bookable on Viator
Otaru has a way of slowing your day down. From Sapporo Station, this tour links you to a quieter port-town mood, then adds hands-on stops like the glass works, music-box sounds, and an actual brewery visit along the canal. It’s an easy way to see the Otaru highlights without juggling train times.
I really like the tight focus on the famous Otaru Canal area. I also like that the plan includes multiple admission tickets, so you’re not spending your day tracking down entry lines and opening hours. One watch-out: lunch isn’t included, so you’ll want to plan where you’ll eat during the Sakaimachi Street window.
If you’re sensitive to spending a chunk of the day on your feet, the stops around the canal and shopping street can feel like a lot in one go. It’s not a hike—just a long, walkable sightseeing run—so wear comfortable shoes and pace yourself.
In This Review
- Key highlights in this Sapporo to Otaru day
- Getting going from Sapporo Station to Otaru’s Canal Area
- Otaru Canal and Sakaimachi Street: where the town’s story comes together
- Kitaichi Glass III on Sakaimachi Street: what the visit is really for
- The Otaru Music Box Museum: Aeolian pipe organ and antique sound
- Otaru Steam Clock: a functional city landmark with an hourly show
- Germain Beer Brewery (Warehouse #1): ending with a canal-side drink
- Price and value: what $165.18 covers (and why it matters)
- Timing, footwear, and lunch planning for an 8-hour Otaru day
- Who this tour suits best
- Should you book the Sapporo to Otaru + local beer tour?
- FAQ
- What time does the tour start?
- Where do I meet the tour?
- How long is the tour?
- What’s included in the price?
- Is lunch included?
- Can I cancel for a full refund?
Key highlights in this Sapporo to Otaru day
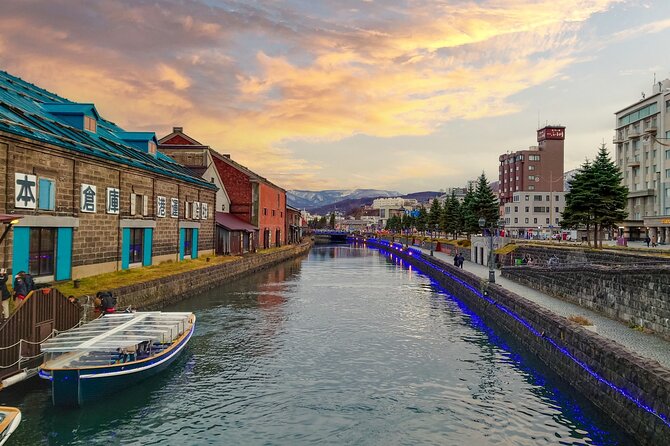
- Otaru Canal first: start at the canal and build your bearings fast in the Sakaimachi area
- Kitaichi Glass Factory time: you’ll get a structured visit along the main sightseeing street
- Otaru Music Box Museum: expect an Aeolian pipe organ and antique-style music boxes
- Otaru Steam Clock: a functional hourly show, including a steam whistle
- Germain Beer Brewery stop: sit right along the canal with a included drink
- Small group feel: capped at 15 travelers, with an English-speaking guide
Getting going from Sapporo Station to Otaru’s Canal Area
You start at 9:00am at MYOMU—the circular stone structure—at the South Exit inside Sapporo Station. This matters more than it sounds. When your first stop is clearly defined right in the station, you waste less time figuring out where the tour begins and you can get to Otaru in a calm, ready mindset.
Otaru is about a 30-minute train ride from Sapporo, so the day feels like one continuous outing rather than a complicated transfer day. The tour handles the transportation fee between Sapporo Station and each destination on the list. For you, that means less map-reading and more time walking where the sights cluster.
Also, it’s designed for small groups (maximum 15). That usually translates into easier movement through museums and shops—less waiting around, more chance to hear your guide’s explanations without the sound system fighting the room.
Otaru Canal and Sakaimachi Street: where the town’s story comes together
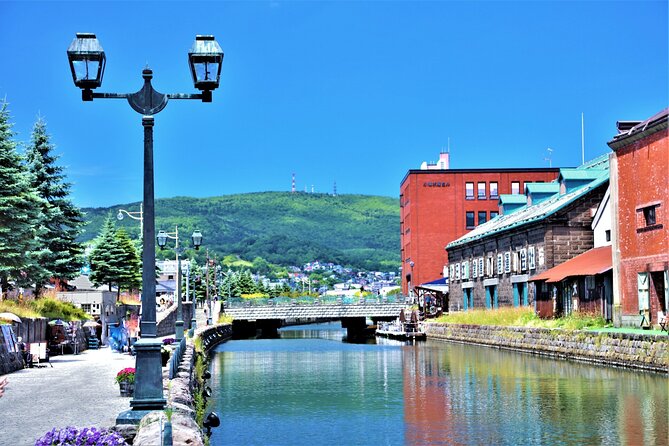
The day begins at Otaru Canal, with a 2-hour block and admission included for the start point. The canal area is the heart of the Otaru experience. You’ll be in the zone where a lot of the older port-town identity still shows up in the streetscape and how the town presents itself to visitors.
From there, you pivot into Sakaimachi Street, the main sightseeing and shopping district tied closely to the canal. The itinerary keeps you concentrated along this corridor because that’s where you can realistically see a lot without zigzagging across town. For me, that’s the smart part: Otaru’s best-known sights are already grouped, so the tour helps you stay in that sweet spot.
What you should expect here: a mix of scenery, strolling, and shopping-friendly streets. Even if you’re not planning to buy much, the area is worth wandering slowly for the old-port atmosphere and the canal views that keep showing up as you move.
Potential drawback: since this is your first big walk block, you’ll feel it later if you don’t manage your energy. If you tend to get tired quickly, treat this canal start as the moment to set your pace early—don’t rush for photos.
Kitaichi Glass III on Sakaimachi Street: what the visit is really for
Next up is Kitaichi Glass III, also with a 2-hour stop. The tour routes you along Sakaimachi Street, which is perfect because you can eat and then head straight into the glass factory area without losing momentum.
The value of this stop is not only that it’s a “factory visit.” It’s that it gives you a reason to slow down in the middle of the day and focus on one craft. Kitaichi glass has a long reputation in the region, and you’ll get a structured look tied to the main shopping corridor where glass items are easy to browse and compare.
A practical tip: plan to use this portion to decide what you want to bring home. If you like glasswork, you’ll likely see enough variety that it’s easier to pick a piece during the visit rather than waiting until the end when you’ve already been walking for hours.
Possible drawback: if you’re not interested in glass at all, this can feel like a “slow” stop compared with more performance-style attractions. In that case, you’ll want to treat your time here as shopping + short sightseeing, not as a deep technical workshop.
The Otaru Music Box Museum: Aeolian pipe organ and antique sound
After lunch time along the way, you head to the Otaru Music Box Museum for a 1-hour visit, with admission included. This is one of those stops that works even if you don’t normally do museums, because it’s built around sound.
The museum experience focuses on heavenly music played by an Aeolian pipe organ, plus glimpses of rare local antique music boxes. That combination is what makes it different from the typical “look around a room” shop. You’re not just seeing; you’re hearing the idea behind the collection, and that makes the time feel purposeful.
What I like about this kind of stop is the pacing. After canal walking and glass browsing, you get a more seated, calmer moment. For you, that can make the afternoon feel less rushed.
One consideration: since it’s a museum inside, it’s still a 1-hour block. If your energy dips in enclosed spaces, plan a slow start when you arrive and don’t cram extra shopping right before you go in.
Otaru Steam Clock: a functional city landmark with an hourly show
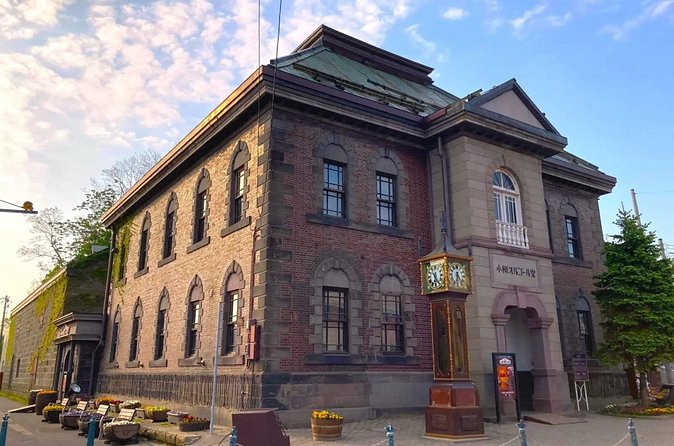
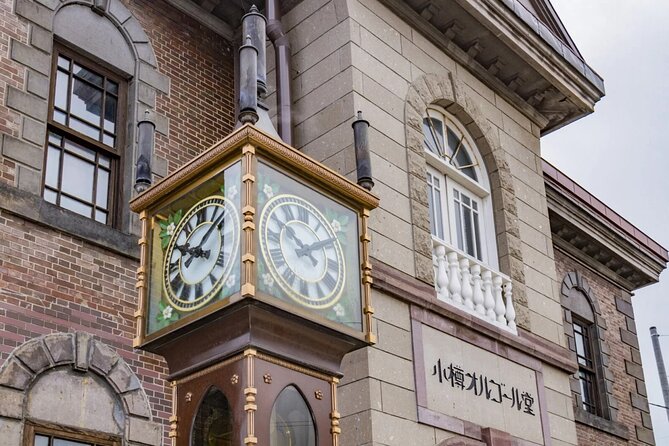
Then comes the Otaru Steam Clock, included with a 1-hour stop. It’s a gift from Vancouver, Canada to Otaru, received in June 1994. The clock works like a mini event: a boiler sends steam into the clock, and a steam whistle blows hourly to tell the time.
That hourly mechanism is exactly why this stop is more memorable than a typical decorative landmark. You’ll be able to watch the motion and hear the signal as part of the show, not just read a sign. For photographers, it’s also a good anchor point for timing your day—since it’s known for happening on the hour.
What to watch for: steam timing can change your sense of when you’ll get the best moment. Try not to treat this as a “quick photo and leave.” Give it the full hour so you don’t miss the moment when the clock is doing its thing.
Potential drawback: if you’re arriving right after one whistle, you might wait. That’s normal here. If you hate waiting, use the extra time nearby for photos and quick street views instead of standing impatiently in one spot.
Germain Beer Brewery (Warehouse #1): ending with a canal-side drink
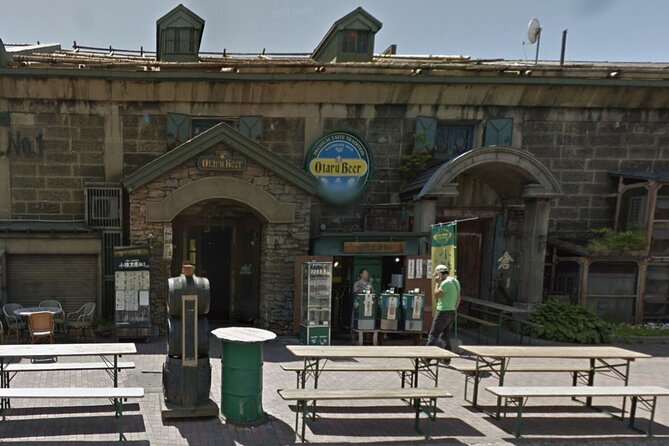
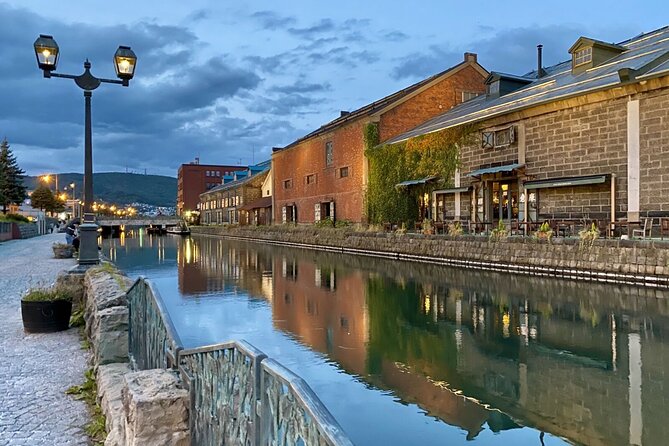
Finally, you’ll “quench your thirst” at Germain Beer Brewery / Warehouse #1. This stop is 2 hours, admission included, and the brewery location is right along the canal—which keeps your day visually coherent. You’re not hopping to some distant bar; you’re staying in the same Otaru atmosphere.
You’ll enjoy a glass of non-alcoholic or alcoholic beverage as part of the tour. That flexibility is a nice detail for mixed groups. And because it’s in a warehouse-like setting along the canal, the mood tends to feel relaxed and scenic instead of purely commercial.
For me, the best part is that this beer stop isn’t just a sticker on the itinerary. It’s a natural way to wrap up the day after museums and factory browsing. You’ve seen crafts, sounds, and a historic-style clock system. Now you get a simple, social break with a drink and time to breathe.
Small consideration: since lunch isn’t included earlier, a lot of people feel more ready for the drink part here. If you’re planning to enjoy alcohol, go easy earlier and pace your meal on the Sakaimachi window so you don’t get caught hungry mid-afternoon.
Price and value: what $165.18 covers (and why it matters)

The tour price is $165.18 per person, and it’s typically booked about 20 days in advance. For a single-day, 8-hour plan, the value comes from how much is already handled.
Here’s what you’re getting without extra stress:
- English-speaking guide
- Transportation fee from Sapporo Station to all listed destinations
- All entry/admission tickets for each attraction
- A included drink at the brewery (non-alcoholic or alcoholic)
If you’ve ever tried to do Otaru on your own, the “hidden” costs add up fast: tickets you might forget to factor in, the time spent checking opening hours, and the frustration of figuring out exact entrances in busy corridors. This tour compresses that into one schedule.
Also, the tour lasts about 8 hours, which is long enough to feel satisfying but not so long that it turns into a full travel-day slog. The stops are spaced to let you see the key icons of Otaru Canal and the Sakaimachi area without tearing across the city.
So the real question for you isn’t just whether $165.18 sounds right. It’s whether you want your Otaru day to run on a built plan. If yes, this price starts to make sense quickly.
Timing, footwear, and lunch planning for an 8-hour Otaru day
Because lunch isn’t included, you’ll rely on the meal window during the day while you’re in the Sakaimachi area. The good news: you’re placed in a district where eateries line up along the same walkable corridor as the sights. That makes it easier to grab something without breaking your schedule.
For a smooth day, I’d plan it like this:
- Eat during the Sakaimachi break rather than trying to “save it” for later.
- Use the canal start as your warm-up walk, then slow down through museums.
- Wear shoes that handle lots of walking. Otaru’s best-known section is meant for strolling.
Also, you get a mobile ticket, which helps on travel days. Fewer printed tickets to manage means you can focus on where you need to be at the next stop.
Group size is capped at 15, so you’re not in a giant swarm. Still, you’ll want to keep your pace steady. If you’re the type who stops every 30 seconds, you might find the time slipping away. If you’re flexible, you’ll enjoy the relaxed vibe a lot more.
Who this tour suits best
This is a strong choice if you:
- Want an easy Sapporo to Otaru day with built-in structure
- Like walking in historic-style streetscapes and seeing craft-focused stops
- Prefer a tour guide to explain what you’re looking at, especially for the music box museum and steam clock
- Want a small-group atmosphere (max 15) rather than a crowded bus day
It’s also a good fit for couples or solo travelers who want company without losing their sense of freedom. You can still wander a bit in the shopping streets, but the major attractions are already scheduled.
If you hate guided pacing or you’re only interested in one or two of the icons (like just the canal), you might feel this is more scheduled than you want. In that case, decide which stops you truly care about—glass, music boxes, steam clock, and the brewery—and then measure your interest against the full itinerary length.
Should you book the Sapporo to Otaru + local beer tour?
I’d book this tour if you want a high-probability Otaru day where the logistics are handled and the highlights are connected by location. The combination of Otaru Canal, craft visits like Kitaichi Glass III, a sound-focused stop at the Music Box Museum, a working landmark at the Steam Clock, and a relaxed finish at Germain Beer Brewery creates a day that feels like a real overview, not a rushed checklist.
One more reason: in our group, our guide Scott did a great job sharing local culture and history as we wandered the streets. That kind of guided context makes the places more meaningful, not just photo stops.
If your top priority is absolute flexibility, you might prefer building your own Otaru plan. But if you want your day to run smoothly, with admission tickets included and a small-group size, this is a smart, value-minded way to experience Otaru from Sapporo.
FAQ
What time does the tour start?
The tour starts at 9:00am.
Where do I meet the tour?
Meet at MYOMU at Sapporo Station (South Exit area, circular stone structure inside the station).
How long is the tour?
The duration is about 8 hours.
What’s included in the price?
You get an English-speaking guide, transportation between the listed stops, admission tickets for each attraction, and a glass of non-alcoholic or alcoholic beverage at the brewery.
Is lunch included?
No, lunch isn’t included.
Can I cancel for a full refund?
Yes. You can cancel up to 24 hours in advance for a full refund.